When I think about keeping my garden looking its best, the endless battle against weeds seems to never end. They sneak up when I least expect it, stealing nutrients and space from the plants I actually want to thrive. Managing these pesky intruders is crucial for maintaining a healthy and vibrant garden.
It’s not just about pulling them up on sight; it’s also about knowing which ones are more pressing than others and why I need to act. By focusing on proactive prevention, I can save myself time and effort while ensuring the plants I cherish have room to grow.
Advertisement
1. Crabgrass: Target early with pre-emergent herbicides

Crabgrass is one of those pesky weeds I like to get ahead of before it becomes a real problem. The key to tackling crabgrass is to use a pre-emergent herbicide in the spring. This prevents those weed seeds from taking root and spreading all over my lawn.
Timing is everything when dealing with crabgrass. I usually apply the pre-emergent just as the soil begins to warm up. This is often when the forsythias start blooming.
Using a granular pre-emergent is my go-to choice. I make sure to spread it evenly across the lawn to target crabgrass and other sneaky weeds. Remember, this won’t help if crabgrass has already sprouted. It’s all about preventive action early on.
2. Dandelions: Dig out the root to prevent regrowth

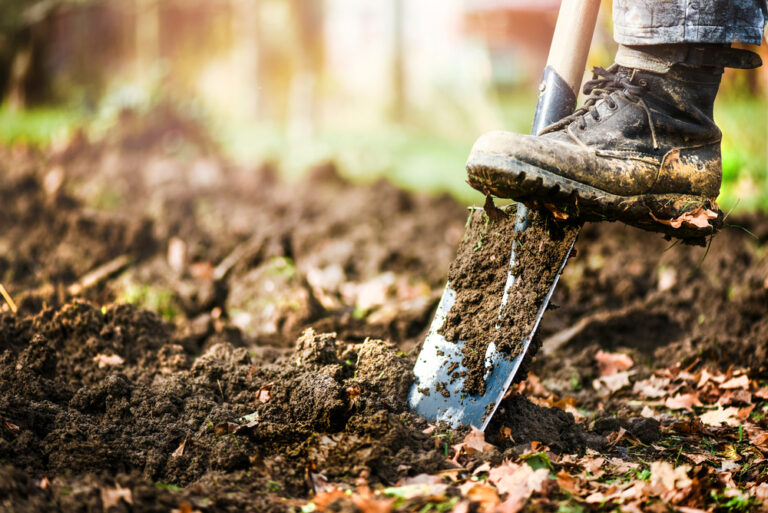
I can’t stand it when dandelions take over my yard. These pesky weeds always manage to find a way back unless I get to the root of the problem—literally. The key to keeping dandelions from coming back is to remove the entire taproot.
I usually use a small shovel or a special tool to dig deep, ensuring I grab all of the taproot. It’s tricky because these roots can go about 10 inches deep. Leaving even a small piece behind means you’ll likely see them again in no time.
Consistent efforts early in the season are my best bet for staying ahead of these weeds. If you’re curious about more techniques, you might want to check out some tool recommendations at Ryan Lawn to effectively manage these stubborn guests.
3. Bindweed: Use Persistent Pulling to Weaken It Over Time

Dealing with bindweed in my garden has been a real test of patience. This pesky plant has deep roots and is notorious for spreading quickly. I’ve found that persistent pulling is key to weakening it over time.
I grab a garden fork and carefully loosen the soil around the roots. This makes it easier to pull without breaking off pieces that might regrow. Consistency is crucial; every time I spot new growth, I make sure to yank it out before it can spread further. Regular attention helps keep it under control.
As an added strategy, I’ve been planting robust plants like borage nearby, hoping they’ll outcompete the bindweed. This method gives my preferred plants a fighting chance, while reducing bindweed growth.
4. Nutsedge: Use a selective sedge herbicide

When I see nutsedge popping up, it’s time to act fast. This pesky weed can take over my lawn if I don’t tackle it promptly. I always opt for a selective sedge herbicide to manage the issue.
I’ve found that products like Ortho Nutsedge Killer work wonders. They focus solely on the nutsedge without harming my beloved grass. I’ve also tried alternatives like Sedgehammer and Dismiss, which have different results.
The key is to apply it promptly before the nutsedge spreads. With a little persistence, I manage to keep my lawn from being overrun by these stubborn intruders.
5. Poison Ivy: Remove with protective gear to avoid skin contact

When tackling poison ivy, I always put safety first. It’s crucial to wear protective gear, like rubber gloves, long sleeves, and pants. This ensures my skin doesn’t come in contact with the plant’s oils, which can cause an itchy rash.
I also make sure to tuck my pants into high socks and wear boots. This keeps those pesky oils off my skin and allows me to confidently remove the plant. Using tools like long-handled shovels helps me keep a safe distance.
To dispose of poison ivy, I use a plastic bag technique similar to picking up after a dog. It’s straightforward and keeps the oils contained. Afterward, a thorough wash up with cold water and a good soap helps keep me rash-free.
6. Quackgrass: Uproot completely to prevent spread

Quackgrass is one of those pesky weeds that can really take over my garden if I’m not careful. This weed spreads through underground rhizomes, making it tough to eliminate just by mowing or trimming.
I find it’s best to dig it out entirely. I aim to remove the entire root system to prevent it from returning. Using a shovel or a sturdy garden fork works well for me.
For additional protection, I consider using techniques like solarization to manage and suppress new growth organically. Uprooting is key in keeping my garden free of this invasive weed.
7. Chickweed: Mulch to Prevent Seed Germination

When it comes to battling chickweed, mulch is my go-to strategy. Laying down a two- to three-inch layer of mulch can really keep those seeds from sprouting. This technique works wonders by blocking sunlight, something chickweed can’t grow without.
I make sure to use a good quality mulch. Products like Preen Mulch with Extended Control offer added benefits beyond just smothering the seeds. For any garden enthusiast, it’s a simple tweak that controls weeds while keeping the garden looking tidy.
While organic mulches like straw or bark chips can be effective, it’s essential to monitor the area regularly. Keeping an eye on the soil surface ensures that any new seedlings are swiftly removed before they become a bigger issue. Plus, it’s a great reason to spend more time in the garden.
8. Thistle: Use a sharp spade to cut below the soil line

Thistles can be a pesky problem in the garden. I’ve found that cutting them 2 to 4 inches below the surface with a sharp spade can effectively prevent them from coming back. This method targets the roots, making it harder for the thistles to regrow.
For smaller patches, hand-pulling them can also be effective, but I always make sure to use a sharp tool to slice through the roots for larger infestations. By weakening the roots, I’m able to deplete the energy they store, which helps in gradually getting rid of them. Consistency is key here; I keep an eye out and repeat the process as needed.
9. Bermudagrass: Solarize soil to eliminate

Bermudagrass can be a real nuisance in the garden. It spreads quickly and is hard to control once it takes root. One effective method I like using is solarization. By capturing the sun’s energy, high temperatures can kill this stubborn grass.
I lay clear plastic over moist soil to trap heat for several weeks. After removing the plastic, mulching with wood chips can help prevent new growth. Solarization works great for warm climates, but it might need extra time in cooler areas. For more details on this method, check out solarization techniques.
10. Clover: Control with periodic mowing

When it comes to clover, I’ve found that the most effective way to manage it is by mowing regularly. Keeping the clover trimmed limits its ability to spread and outcompete the grass.
I make sure not to cut the lawn too short, though, because that can weaken the grass and give clover more opportunities to thrive. Mowing around the same height can help maintain a good balance.
For added control, a grass-selective herbicide can be useful, but I usually rely on my trusty mower first. Check out this approach to maintaining clover plots for more tips.
11. Ragweed: Remove Before It Flowers to Reduce Pollen Spread

I always try to tackle ragweed early in the season before it gets a chance to flower. Once it starts flowering, its pollen can be a major allergy trigger. My strategy is simple: remove it before it becomes a problem.
Pulling ragweed by hand works well, especially when the soil is moist. I make sure to get the roots so it doesn’t come back. If the plants have already flowered, I bag them carefully to prevent any pollen spread. It’s a constant battle, but dealing with ragweed early makes a big difference in keeping the yard and my allergies under control.
12. Lambsquarters: Hand-pull young plants

I often find lambsquarters popping up in my garden, and they can be tricky if left unchecked. To nip the problem in the bud, I make sure to hand-pull these weeds when they’re young.
Getting them out by the roots is key, so I make it a point to remove as much of the root system as possible. If I don’t, they can regrow and become even more of a nuisance.
I try to check regularly and pull any new sprouts. This keeps the plants from getting too big or producing seeds. For other tips, I’ve found it useful to check resources like those about managing common lambsquarters.
*This article was created with the help of AI.